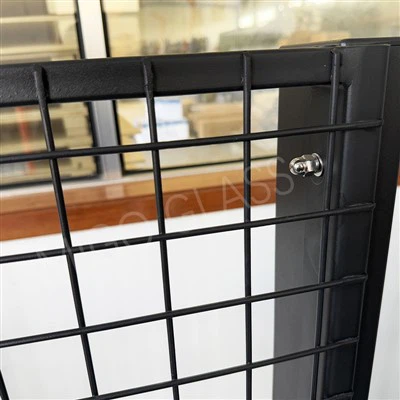
Installing padel court glass is one of the most critical stages of padel court construction. Even the highest-quality 10mm or 12mm tempered glass can fail prematurely if installed incorrectly.
Professional installation ensures:
Long-term structural safety
Maximum glass lifespan
Accurate panel alignment
Reduced maintenance costs
Compliance with international safety standards
This guide outlines the recommended installation sequence used by experienced padel court builders. While hardware systems may vary between manufacturers, the principles below apply to most professional padel court installations.
Before You Begin
Before unpacking any glass panels, verify that the project site is ready.
Confirm the Following:
Concrete foundation has cured and meets the engineering drawings.
Anchor bolts are correctly positioned.
Steel structure has been fully assembled.
All steel posts are plumb and securely fixed.
Cross beams are correctly aligned.
All glass accessories are available.
Installation drawings match the supplied glass.
Installing glass before confirming these items may result in unnecessary stress and alignment issues.
Tools and Equipment Required
Professional installation should be carried out using appropriate equipment.
Typical tools include:
Vacuum glass lifters
Glass suction cups
Torque wrench
Spirit level
Laser level
Soft rubber mallet
Plastic alignment shims
Protective gloves
Safety helmets
Lifting straps (for large panels)
Never attempt to lift large tempered glass panels manually without suitable lifting equipment.
Step 1. Inspect Every Glass Panel
Before lifting any glass:
Inspect for:
Edge chips
Surface scratches
Cracks
Incorrect dimensions
Hole alignment
Transportation damage
Do not install damaged glass. Even a small edge chip can significantly reduce the panel's strength.
Step 2. Verify the Steel Structure
Before installing the first panel, inspect the steel frame.
Check:
Vertical alignment of posts
Beam levelness
Overall squareness
Hole positions
Frame dimensions
The steel frame should fit the glass-not the other way around.
Never force glass into a distorted structure.
Step 3. Install Protective Spacers
Before positioning the glass:
Install:
Plastic conical washers
Rubber setting blocks
Edge protection pads
Isolation spacers
These components prevent direct glass-to-steel contact and help distribute loads evenly.
Never omit these accessories, even if the glass appears to fit perfectly.
Step 4. Lift the Glass Safely
Using vacuum lifters:
Lift the panel vertically.
Keep the glass stable during movement.
Avoid twisting the panel.
Prevent edge impacts.
Never drag the glass across concrete.
Large panoramic panels should always be lifted by multiple trained installers using certified lifting equipment.
Step 5. Position the Glass Carefully
Lower the panel slowly into its final position.
During positioning:
Maintain the specified expansion gap.
Avoid edge contact with steel.
Ensure the panel rests on rubber setting blocks.
Check that bolt holes align naturally.
If force is required, stop and investigate the cause.
Step 6. Insert Bolts by Hand
Insert every fixing bolt loosely before tightening.
Do not fully tighten one bolt while others remain loose.
Hand-tight installation allows the panel to settle naturally within the frame.
Step 7. Tighten Bolts Evenly
Once all bolts are installed:
Use a calibrated torque wrench.
Tighten bolts gradually using a diagonal sequence.
Avoid:
Impact wrenches
Uneven tightening
Excessive torque
Over-tightening is one of the leading causes of installation-related glass breakage.
Step 8. Check Glass Alignment
After tightening:
Verify:
Uniform gaps between panels
Vertical alignment
Horizontal alignment
Flush panel surfaces
Proper hardware seating
Small adjustments should be completed before final torque is applied.
Step 9. Repeat for Remaining Panels
Continue installing the remaining glass panels using the same sequence.
Never rush the installation.
Each panel should be fully inspected before moving to the next.
Consistency is more important than speed.
Step 10. Final Inspection
After all glass panels have been installed:
Complete a comprehensive inspection.
Confirm:
✔ No glass-to-steel contact
✔ Expansion gaps maintained
✔ Bolts tightened correctly
✔ Plastic washers installed
✔ Rubber spacers positioned properly
✔ Glass surfaces undamaged
✔ Steel structure remains aligned
✔ All accessories securely installed
Only after passing the final inspection should the court be opened for use.
Common Installation Mistakes to Avoid
Many cases of glass breakage result from preventable installation errors.
Avoid the following:
❌ Over-tightening bolts
❌ Missing plastic conical washers
❌ Direct glass-to-metal contact
❌ Forcing misaligned glass into position
❌ Ignoring foundation inaccuracies
❌ Installing chipped glass
❌ Using impact tools on fixing bolts
❌ Omitting the final inspection
Attention to these details can significantly reduce the risk of future failures.
Safety Tips During Installation
Always prioritize safety.
Recommended precautions include:
Wear cut-resistant gloves and safety footwear.
Use certified lifting equipment.
Keep unnecessary personnel out of the lifting area.
Never lift glass in high winds.
Store glass panels upright on suitable racks before installation.
Handle edges carefully to avoid chipping.
Proper safety practices protect both installers and materials.
Why Choose Qingdao Migo Glass?
Successful installation begins with precision-manufactured glass.
Qingdao Migo Glass provides premium padel court glass featuring:
10mm & 12mm tempered safety glass
Precision CNC-drilled countersunk holes
Fully polished edges
Safety corner finishing
Optional Heat Soak Tested (HST) glass
CE, SGCC, and AS/NZS certified products
Complete installation accessories
Technical support for global projects
Every panel is inspected for dimensions, hole accuracy, edge quality, and appearance before shipment, helping installers achieve faster, safer, and more accurate installation.
📩 Contact Bella Xie for price & technical details of padel court glass
📧 bella@migoglass.com
📱 WhatsApp: +86 18561397391