I. Pre-Installation Preparation: A Critical Stage for Success
Adequate preparation before formal construction can prevent extensive rework later.
1. Site Measurement and Design Confirmation
● Accurately measure site dimensions (length, width, height)
● Confirm the glass enclosure layout (including goalposts, corners, and buffer zones)
● Verify the structural drawings against the steel structure or concrete foundation location
2. Material Preparation
Common padel court glass components include:
● Tempered glass (typically 10mm–12mm)
● Stainless steel or aluminum alloy clamps
● Rubber pads (shockproof, explosion-proof edges)
● Anchor fasteners (expansion bolts or embedded parts)
3. Construction Safety Inspection
● Ensure the base layer strength meets standards
● Check the accuracy of embedded part positions
● Clean up debris in the installation area
II. Drilling and Embedding: Precision is Key
This stage directly determines the success of the glass installation.
1. Positioning and Laying Out
Using a laser level or total station:
● Mark the glass installation line
● Mark the positions of the columns and clamps
● Ensure all lines are closed and level
2. Hole Construction
Drill or pre-embed according to design requirements:
● Concrete floor: Use an impact drill to drill holes
● Steel structure: Reserve bolt holes or weld bases
● Depth and diameter must conform to bolt specifications
⚠️ Note:
● Hole position error must be controlled within ±2mm
● Avoid damaging the main structural steel reinforcement
3. Installing Embedded Parts
● Insert expansion bolts or chemical anchors
● Correct verticality
● Initially fix the brackets or bases
III. Glass Installation: Core Construction Steps
This is the most crucial step in the entire project.
1. Glass Inspection Upon Arrival
● Check for cracks or chipped edges
● Confirm dimensions match design
● Check tempered glass markings and certifications
2. Installation Sequence
It is recommended to start installation from the corners or fixed ends:
1. Place rubber pads (to prevent direct contact with metal)
2. Erect the glass panel (requires 2-3 people)
3. Align with clamps
4. Temporarily secure
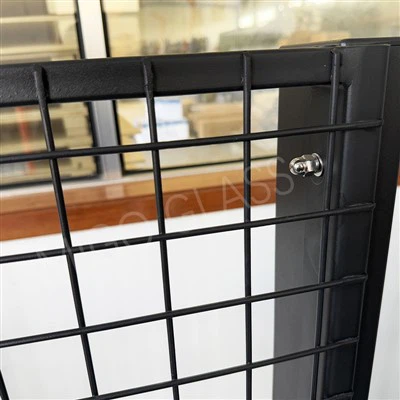
3. Secure with clamps
● Install U-clamps or point connectors
● Initially tighten bolts (do not tighten all at once)
● Adjust glass verticality and spacing
4. Install piece by piece
● Install the next glass panel in sequence
● Maintain uniform gaps (usually 3-5mm)
● Use positioning clips to maintain consistent spacing
IV. Fine-tuning and Reinforcement: Ensuring Long-Term Stability
1. Vertical and Horizontal Correction
Use a level to repeatedly check:
● Is the glass vertical?
● Is the entire structure a straight line?
● Are the corners aligned?
2. 1. Tightening Bolts
● Tighten all fixing points gradually and evenly
● Avoid excessive local stress leading to stress concentration in the glass
3. Shockproofing
● Install rubber pads between the clamps and the glass
● Prevent breakage due to impact during competition
V. Sealing and Finishing: Enhancing Safety and Aesthetics
1. Sealing with Adhesive
● Use weather-resistant silicone sealant
● Fill glass gaps and edges
● Waterproof, dustproof, and shockproof
2. Cleaning
● Remove stains from the glass surface
● Check for construction residue
3. Final Acceptance
Key Inspection Points:
● Looseness
● Obvious misalignment
● Intact surface
● Overall structural stability

VI. Common Problems and Solutions
1. Slight wobbling after glass installation
Cause: Clamps not tightened or insufficient gaskets
Solution: Retighten and add rubber pads
2. Glass edge cracking
Cause: Uneven stress or hard contact
Solution: Replace the glass and optimize the gasket structure
3. Uneven installation gaps
Cause: Positioning error
Solution: Recalibrate the installation sequence and spacing
VII. Summary
padel court glass installation may seem simple, but it actually involves multiple stages, including structural measurement, precise positioning, stress control, and safety details. Only by strictly following the process and controlling each step from drilling to fixing can the final field be ensured to be both safe and durable, while also providing a professional-grade sports experience.